
My main workstation is currently the ASUS Zephyrus G14 GA402RK which is approximately 3 years old at the time of this post and I’ve been noticing temp problems more and more. I’ve been cleaning the fans and grills but it seems the liquid metal has settled off the CPU and GPU dies since I’ve been using this laptop at an angle due to the mount I’m currently using which is why I’ve decided it’s high time to remove the liquid metal and replace it with a PTM7950.
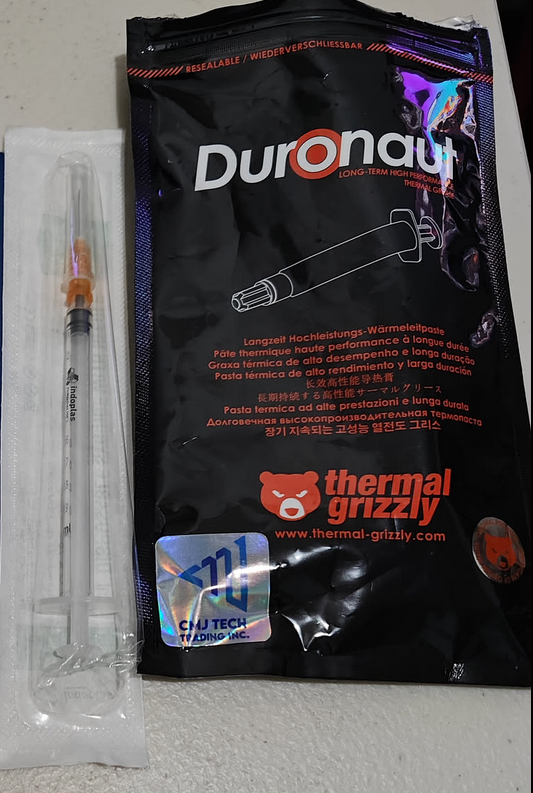
Ordering a PTM7950 is easy thanks to Lazada. Ordered two (I always order in pairs just-in-case) and then I thought, what about the memory and VRMs? Thankfully, Datablitz came to the rescue with Thermaltake’s Duronaut. Now why a paste instead of a putty you might ask? Well, IMO, I don’t like handling thermal putty. Simple right? LOL! 😝 Anyways, I’ve long since read that Duronaut was quite viscous which is why it’s being touted for its longevity which, I thought, was quite what I wanted for an apply now and forget substitute for thermal putty for the VRMs, memory chips, among other things. Not to mention that, in laptops, the distance between the heatsink and the non-die components are reaaaaaally miniscule (< 1mm) so it’s feasible to use paste rather than putty.
After ordering, the next thought that came to mind was, how would I remove the liquid metal. I’ve been fighting the need to do this for quite some time since I know of the hassle of removing liquid metal from the laptop’s dies. But then while getting my food delivery downstairs, I saw the small pharmacy on the first floor and thought, A SYRINGE! And so I procured the smallest syringe I could get since I’d only be using it for liquid metal removal/harvesting.
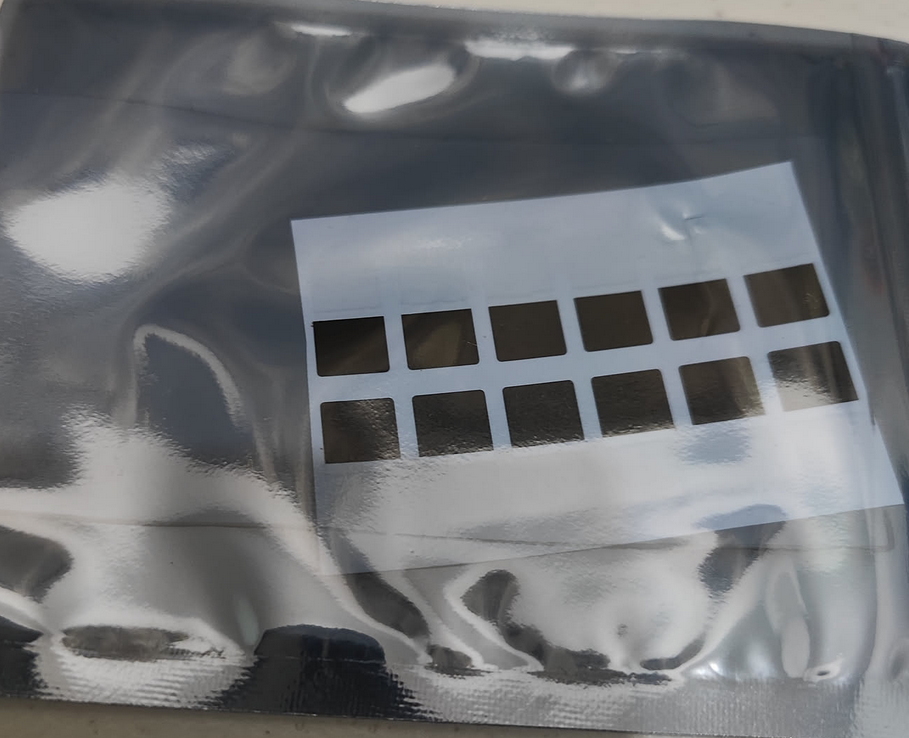
After a few days, we have:
*didn’t include the PTM7950 since it came in a generic anti-ESD bag
And so comes the time to disassembly and after a bit of finagling with screws, battery removal, cable disconnections, and carefully getting the heatsink off without getting liquid metal everywhere, we have:
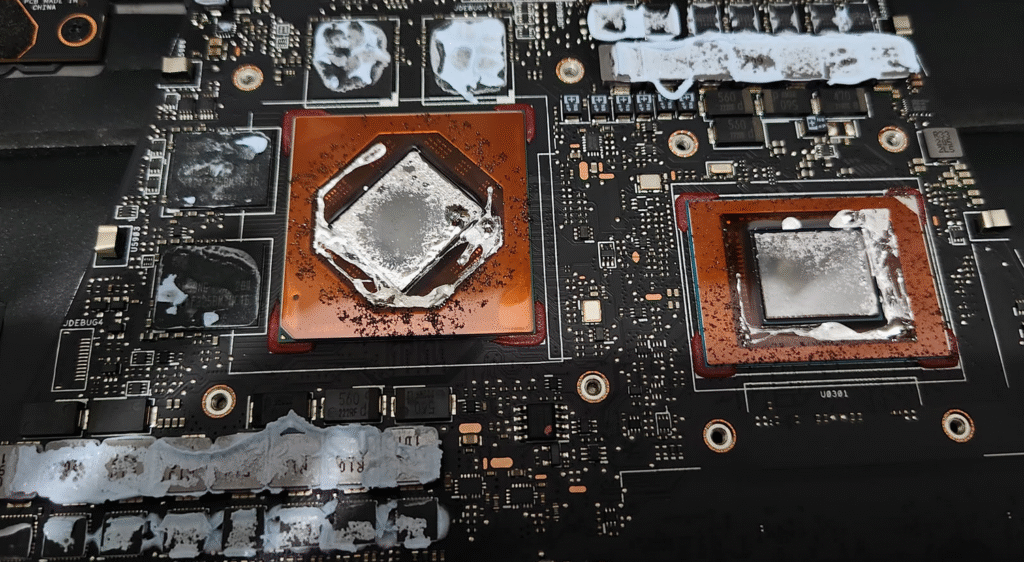
As you can see, much of the liquid metal has indeed settled outside the dies. And so cleanup began.
I first tackled the putty on the VRMs, and memory chips. Afterwards came the liquid metal removal. Now I didn’t get to take pictures here since it was a stressful/difficult procedure. First I used q-tips to her the liquid metal onto one big blob on the die itself. After, suck it up using the syringe. If they’re not in a big blob it won’t work. Maybe the surface tension of the big blob allowed the syringe to suck it up but in smaller quantities, the weight of the liquid metal was too much for the suction? Anyways, when there was no more liquid metal to be herded, I used a tissue with some alcohol to pinch up anything remaining. I think there was still some left at the sides of the dies but they’re not moving even when being prodded by the syringe’s needle so I think I could just size the PTM7950 a bit larger to cover those areas. I also didn’t remove the foam “dam” on the heatsink so even if there are minute amounts that manage to pool again, it shouldn’t leak out.
As to applying the PTM7950s, these came with applicators which I didn’t use at first. But after a couple of times tearing the PTM, I tried using the applicators and found that they made removing the plastic easier!
*PTM7950 with applicator stickers
I’d recommend that if you’re going to apply the PTM, use the applicators. The PTM tears too easily even when cooled beforehand.
Afterwards, I took the Duronaut and applied little beads on top of the VRMs and memory modules… anywhere that previously had putty. Afterwards, I replaced everything and booted up my laptop and…waited. Boot-up took a few minutes since it was memory training.
As a side-note, it takes my laptop a few minutes from a cold-boot to start since it has an asymmetrical memory size. The onboard non-removable memory module is 16GB but the memory I installed as the second one is 48GB! YES! 48GB! Why? Because I wanted 64GB of total RAM on this thing. Anyways, rant complete. 😁
After booting up, everything seemed ok. And my temps are not INSANELY lowered from before. Now, I didn’t perform an average calculation between before and after temps so this isn’t perfect but based on my observations, before repaste, my idling temps (while running youtube or something in the background) were somewhere in the 70-90 C range. Now though, It’s not gone above 70 C!!! 😲 While compiling my own kernel, I’ve also noticed that it’s able to maintain 4.0Ghz minimum throughout the compilation while before it’ll fall below due to temps. Amazing! When resuming from sleep, it also took awhile before the temps exceeded the 5X C range. Hell, even while writing this, my temps fall back to 59 C every now and then and I have a YouTube video playing in the background with GPU1 (680M) sporadically going to 99% utilization at 57 C.
In conclusion, this has been a worthwhile maintenance operation. Temps are back down and due to PTM7950 and Duronaut having great longevity, I doubt I’d need to redo this anytime soon. If you have an old laptop, I’d recommend doing this if you’re confident or having it done by someone competent. Removal of liquid metal is not for the faint of heart. The whole time I was very careful since if any of it falls onto the board and manages to bridge two metal points, I might be saying bye-bye to my laptop. I’ve been playing Space Marines 2 on it and it’s smoother than it was before. I expect temps to improve as the PTM burns itself in after a few days. All-in-all, 10/10 for both PTM7950 and Thermaltake Duronaut! Also thanks to Datablitz for same-day delivery and Lazada for the quick 2nd day delivery.
Any questions? Suggestions? Comments? Feel free to comment and I’ll try and answer it if I can.
Leave a Reply